Children’s Activities
Contact Paper Butterfly Art Activity

Contact Paper Butterfly Art Activity
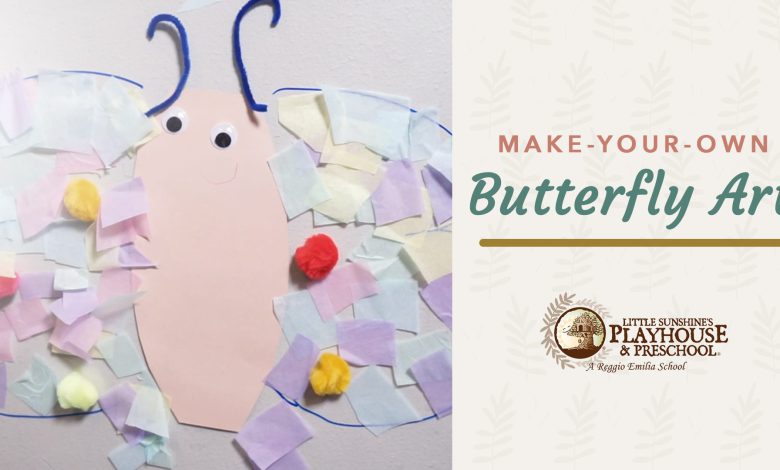
Put your creativity to work with this Butterfly Art activity. Follow along with our craft video tutorial to build a simple wall design that the little ones can decorate to their liking.
Supplies:
- Scissors
- Pom Pom Balls (optional)
- Tissue Paper
- Crayon
- Contact Paper
- Pipe Cleaner
- Marker
- Googly Eyes
- Tape
- Cardstock or Construction Paper (We used 12 x 12)
Instructions:
- Cut a sheet of contact paper to make your butterfly canvas
- Grab your cardstock or construction paper and cut the body of the butterfly
- Use the back of the contact paper and place the body of the butterfly in the middle
- With your permanent marker, draw the shape of the butterfly wings
- Now turn your contact paper over and you will be able to see the butterfly wins showing through
- Hold the contact paper to the wall and peel a corner. You will want to take that corner down and then move to the next corner. Once you have two corners taped to the wall you will want to remove the backing of the contact paper.
- Put together the items the children will need to make the butterfly (tissue paper, pom pom calls, pipe cleaner cut in half, googly eyes, butterfly body from cardstock and the crayon).
- Have your children start by attaching the body to the contact paper. Next, move to the pipe cleaners, googly eyes and mouth.
- Now simply have fun decorating the wings of the butterfly with pom poms and tissue paper.


